Example A-7: Manipulation of the Structure Using Masks (II)
The goal of this example is to create a 3D part with a random dispersion of elements in an empty space. This is achieved by creating an empty model and then applying a boolean mask to it which will be a random array of 0 and 1.
It should be noted that this model can also be created using the method introduced in Example A-5, but the goal here is to create and apply a boolean mask. This example shows that a mask can be created using any means and as long as it is of an appropriate size and data type, it can be applied to the part.
First, a 3D part with a shape of 50×75×100 voxels is created with a base material of 0 (empty space) and a voxel size of 0.02 units in all directions. The parameter log_debug is set to True for demonstration purposes.
Afterwards, numpy is imported and an array is created using its choice function:
random_mask = random.choice((True, False), size=part.size)
The mask is then applied to the part with a value of 1 which corresponds to MAT-1:
part.apply_mask(mask=random_mask, value=1)
Finally, The part is exported to an Abaqus™ input file in 3D mode with C3D8R elements. The Non-Empty elements are requested to be exported.
The code can be found in the examples folder of the main repository. It is also included below:
"""Script for Example A-7: Manipulation of the Structure Using Masks (II)."""

from numpy import random
from vcams.voxelpart import VoxelPart

# Create the part.
part = VoxelPart(size=(50, 75, 100), base_material=0, voxel_size=(0.02, 0.02, 0.02), name='Ex A-7 Mask Manipulation 2',
                 description='Example A-7: A 50*75*100 part created using a random boolean mask.', log_debug=True)

# Create a random mask with the same shape as part.data.
random_mask = random.choice((True, False), size=part.size)

# Apply the mask to the part.
part.apply_mask(mask=random_mask, value=1)

# Output the part.
part.output_abaqus_inp(file_name='ex_a7_mask_manipulation_2',
                       elem_code='C3D8R', dim='3D',
                       material_elem_sets='Non-Empty')
The final model looks like Fig. 15. Note that the part has been cut at the middle of its X dimension to better show the empty space.
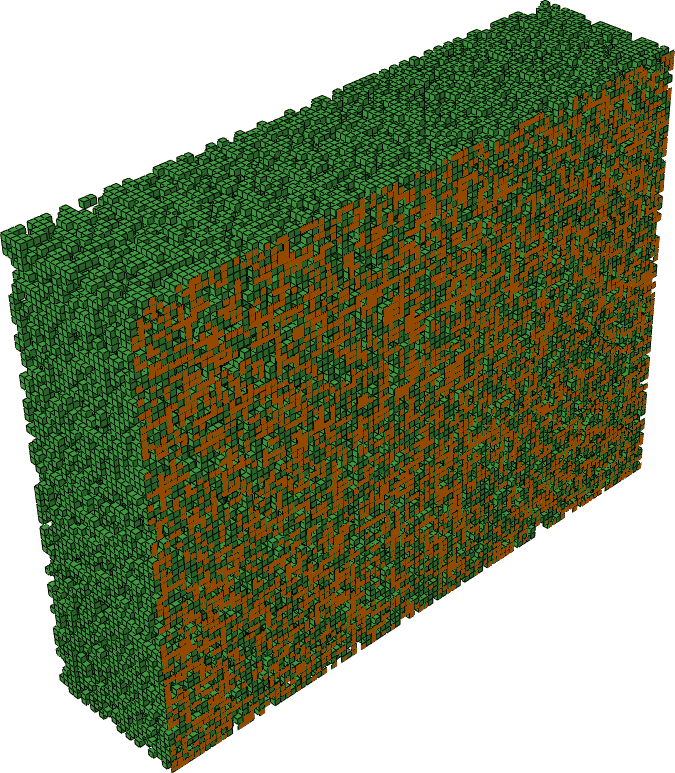
Fig. 15 Final model of Example A-7. The part has been cut at the middle of its X dimension to better show the empty space.