Example C-6: Part from Image Series (3D)
In this example, a 3D part is created based on a sequence of images.
Two methods are presented, with the first using
the mask_from_image_sequence() function
which binarizes the image using the default Otsu’s Threshold
and returns a 3D Boolean mask, which is then applied to the part.
The second method uses the voxelpart_from_image() function
that does all of this automatically.
The image set used in this example is a micro-CT scan of the tibia of a mouse. It has been made available by the authors of this data paper [1] and its corresponding figshare collection. The dataset is large and has not been included here, but it can be downloaded from the aforementioned links.
In the collection, the micro-CT scan used is named MicroCT of mouse tibiae-oim4 and consists of 991 images (which will be in the z-direction of the model), each being 784×784 pixels. Each voxel is reported to be 5.06 micrometers. The model is scaled at 50%, which means that voxel size must doubled.
The First Method
First, the image sequence is converted to a mask without being re-scaled. The load_pattern parameter is set to a path which describes all of the images in the sequence. They will be automatically be loaded in alphabetical order:
image_mask = mask_from_image_sequence(load_pattern=r'D:\MicroCT of mouse tibiae-oim4\28Oim__rec0???.bmp',
                                      scale=0.5, denoise=True)
Then, a 3D part with the same shape as the mask is created with a base material of 0 (empty space) and a voxel size of 0.01012 units in all directions. The parameter log_debug is set to True for demonstration purposes.
Afterwards, the Boolean mask is applied to the part with a value of 1. This means that the values of the elements selected by the mask are set to 1, making them the only non-empty elements in the model. And finally, the part is then exported to an Abaqus™ input file in 3D mode with C3D8R elements. The Non-Empty elements are requested to be exported.
The code can be found in the examples folder of the main repository. It is also included below:
"""First Script for Example C-6: Part from Image Series (3D)"""

from vcams.mask.image import mask_from_image_sequence
from vcams.voxelpart import VoxelPart

# Create a Boolean mask based on the image stack.
# The image stack is taken from https://doi.org/10.6084/m9.figshare.c.3795019.v1
# Which is from the article in https://doi.org/10.1038/sdata.2018.100.
# Note that size of voxels in the unscaled image is 5.06278 micrometers.
image_mask = mask_from_image_sequence(load_pattern=r'D:\MicroCT of mouse tibiae-oim4\28Oim__rec0???.bmp',
                                      scale=0.5, denoise=True)

# Create the part based on the size of image_mask.
part = VoxelPart(size=image_mask.shape, base_material=0, voxel_size=(0.01012, 0.01012, 0.01012),
                 name='Ex C-6 Part from Image Series 3D - A',
                 description='A 3D part created based on a series of 2D images.', log_debug=True)

# Apply the Boolean mask to the part.
# The elements selected by the mask will be set to 1.
part.apply_mask(mask=image_mask, value=1)

# Output the part.
part.output_abaqus_inp(file_name='ex_c6_image_3d_a',
                       elem_code='C3D8R', dim='3D',
                       material_elem_sets='Non-Empty')
The Second Method
This method uses the voxelpart_from_image() function
which automatically does all of the steps used in the first method.
it is more convenient, but allows for less customization.
"""Second Script for Example C-6: Part from Image Series (3D)"""

from vcams.voxelpart import voxelpart_from_image

# Create the part from the image stack.
# The image stack is taken from https://doi.org/10.6084/m9.figshare.c.3795019.v1
# Which is from the article in https://doi.org/10.1038/sdata.2018.100.
# Note that size of voxels in the unscaled image is 5.06278 micrometers.
part = voxelpart_from_image(image_dim='3D',
                            image_path=r'D:\MicroCT of mouse tibiae-oim4\28Oim__rec0???.bmp',
                            scale=0.5, denoise=True,
                            background_material=0, foreground_material=1,
                            voxel_size=(0.01012, 0.01012, 0.01012),
                            name='Ex C-6 Part from Image Series 3D - B',
                            description='A 3D part created based on a series of 2D images.',
                            log_debug=True)

# Output the part.
part.output_abaqus_inp(file_name='ex_c6_image_3d_b',
                       elem_code='C3D8R', dim='3D',
                       material_elem_sets='Non-Empty')
Results
The initial image and the final model are shown in Fig. 21. It should be noted that the method used here is very crude. Realistically, the images must be further processed to reduce noise (note the specks on the image), improve binarization, and remove the support structure. Also, even the scaled model is very big (3.9M elements) and may not be feasible for finite element analysis.
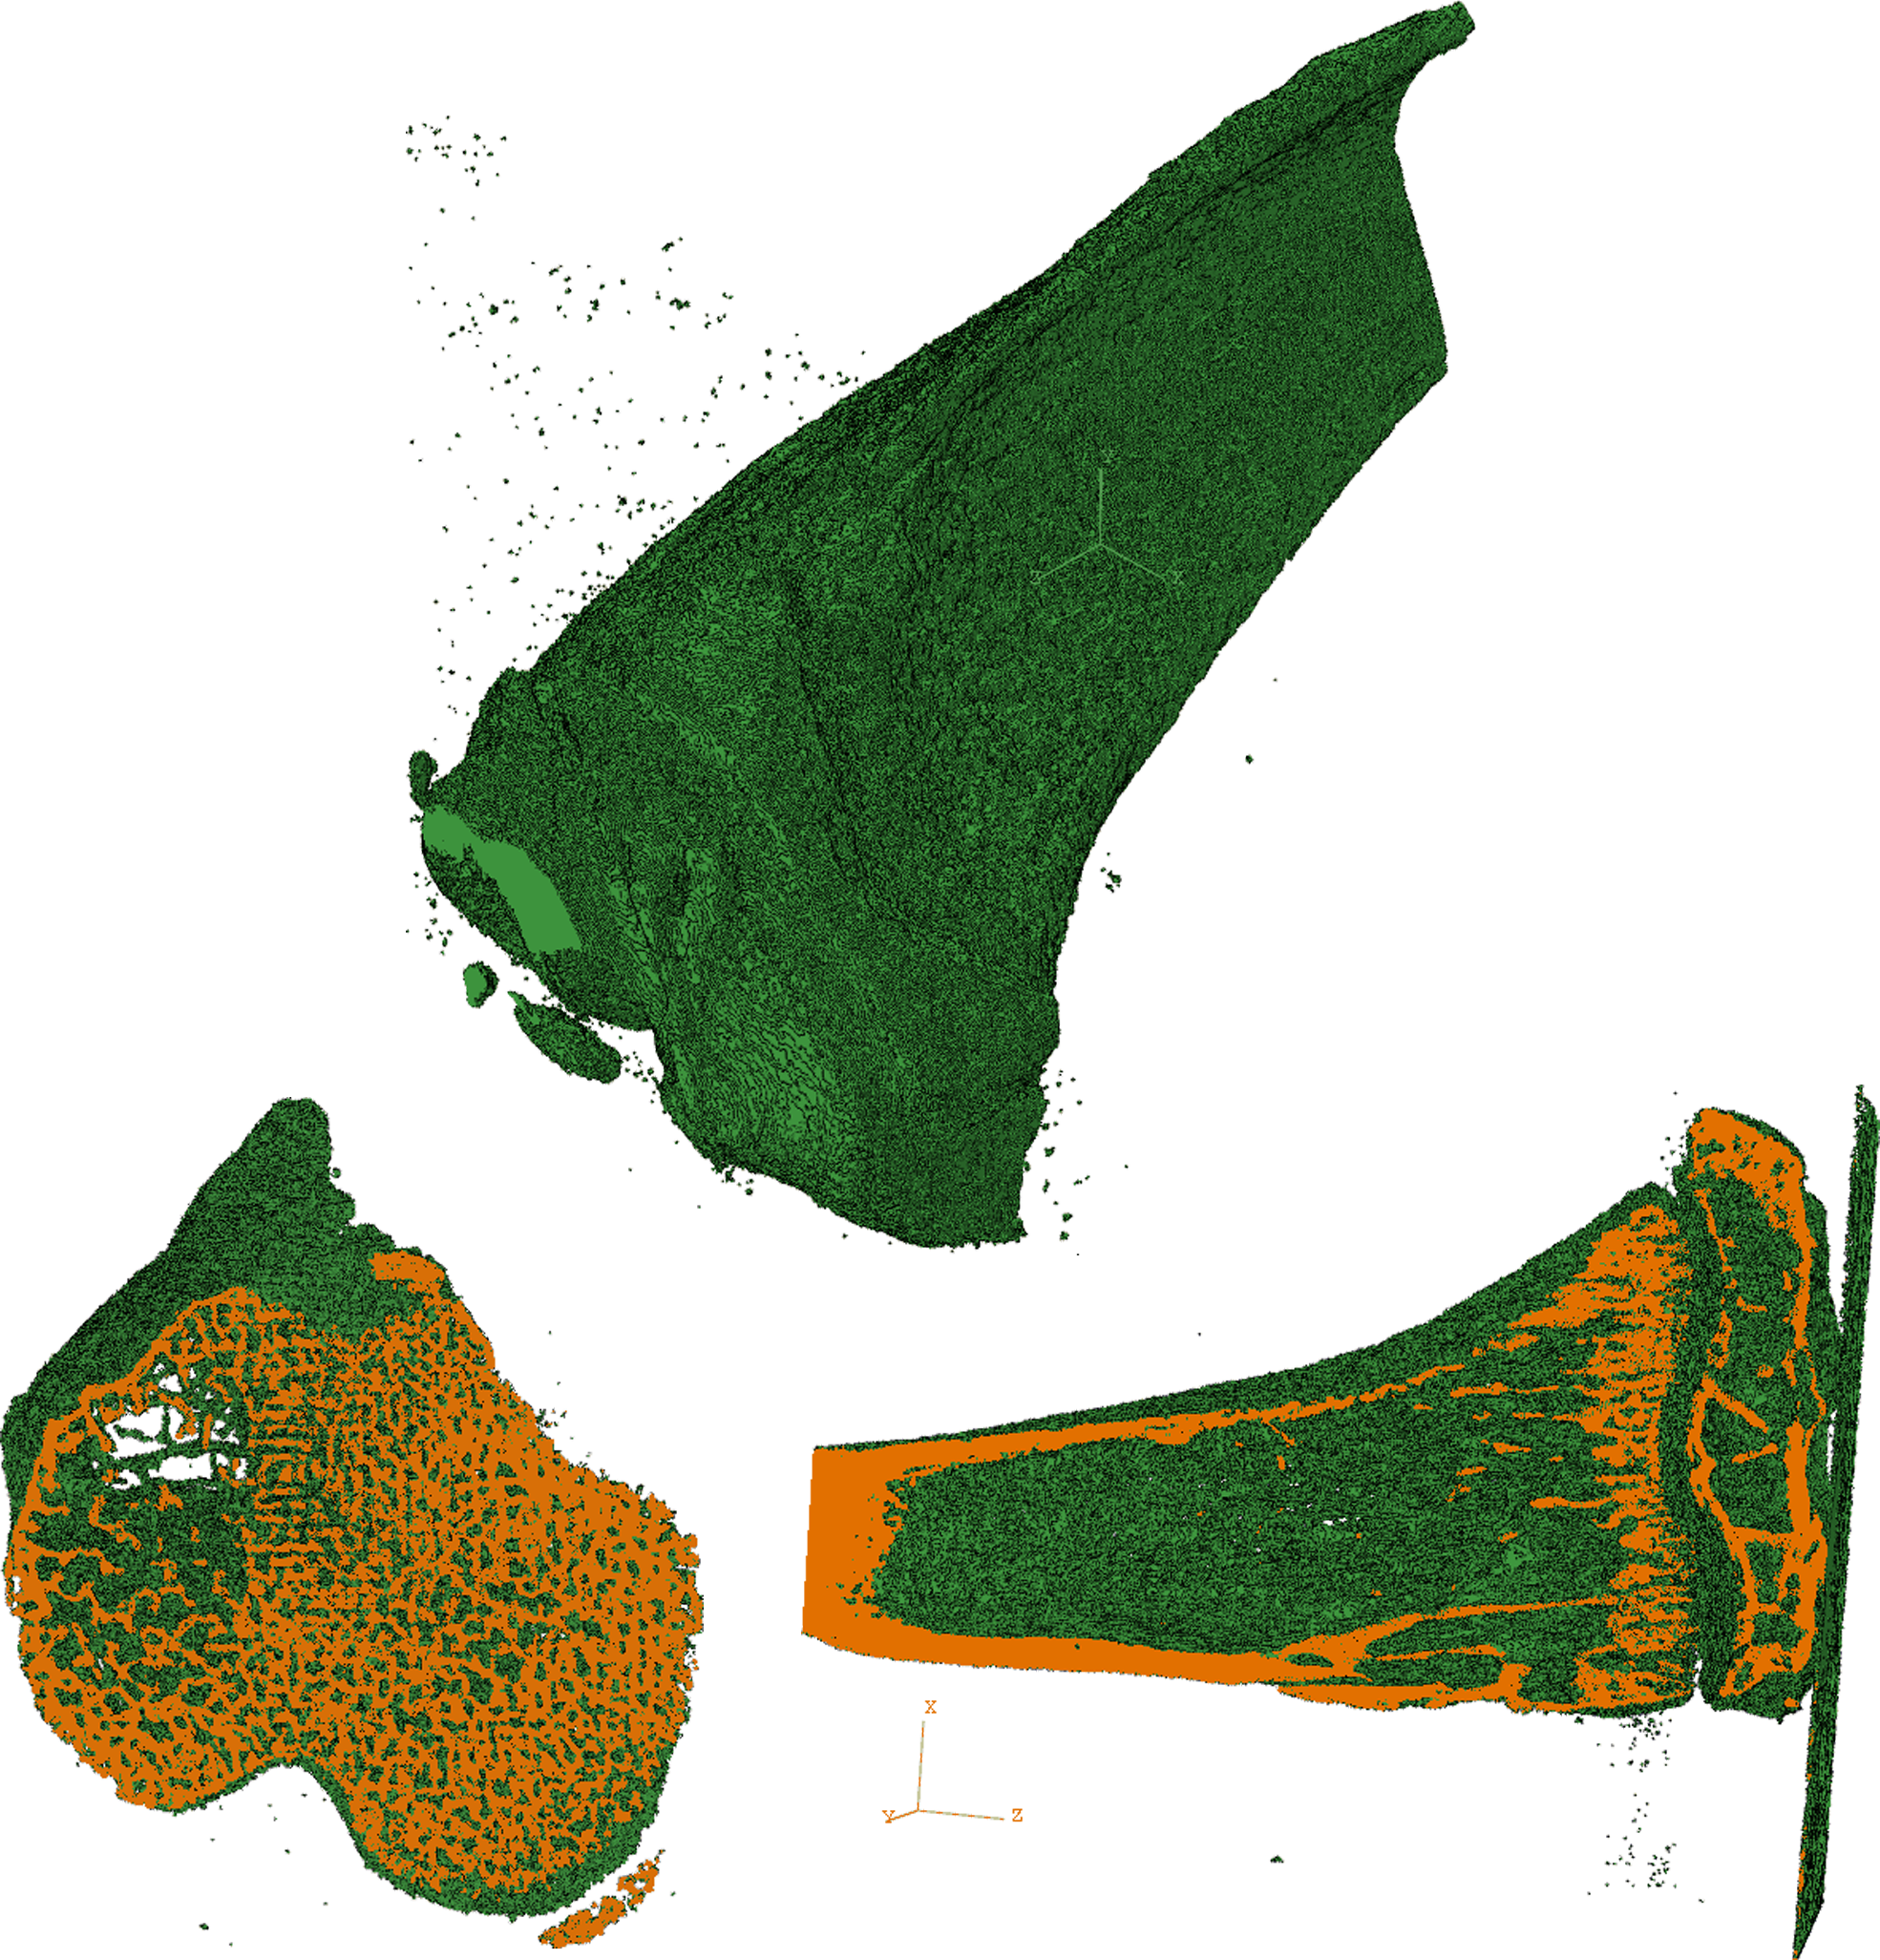
Fig. 21 Isotropic image and two cross-sections of the model for Example C-6.